|
|
| | | Lister's Guide | |  |
|
Tutorial for Show Listers
|
|
|
|
|
|
|
|
|
|
|
|
|
|
|
|
|
|
|
|
|
|
|
|
|
|
|
| Thank
You for taking the time to view this Gas & Steam Show lister's tutorial.
If you are new, or just need a refresher, this tutorial will help you
avoid many of the common mistakes made when listing a show. Your Advertisement
will present a much better look if some preplanning is done. |
|
|
|

|
|
Before
Listing your event, jot down on paper a show name and description.
In your description remember that a broad range of the public with
very little knowledge of your event will be viewing your advertisement.
This audience will need a very detailed description of your event.
Information you should consider including is show location, show dates,
admission fees, driving instructions, camping information, rain dates,
contact names, phone numbers, email addresses, and lodging information.
Please remember that your event may just be the family summer vacation.
After you gather all the pertinent information and Image files you plan to
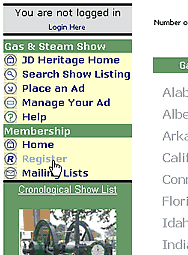
upload, Its time to get started. If
you haven't already done so, start by become a registered member, this
is a two step process,
it is very simple, Free, and required so that you are the only person
allowed to modify your Advertisement. You may start the Registration
process by clicking on the link indicated to the left.
|
|
|
|
| |
|
|
|
|
|
|
|
|
|
|
| Read
the user agreement, check the agree box, fill out the simple information
form, and then click the Register button. In a moment you will receive
an Email message that includes your Username, and new Password. If this
password is difficult to remember, you may change it to something you
can easily remember by using the Change
Password Link. |
|
|
|
|
|
|
|
|
 |
|
|
|
|
|
|
|
|
|
|
|
|
|
|
|
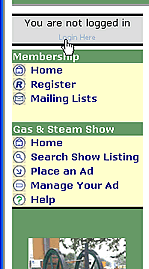
We
are now ready to begin the Gas & Steam Show listing
process.
Start by Logging
in with your Username and Password as indicated to the right. |
 |
|
|
| |
|
|
|
|
|
|
|
| Now
that you are logged in we may start the Ad listing process, by using
the "Place
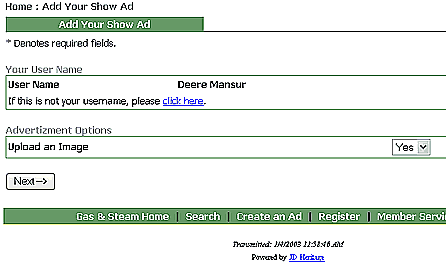
an Ad" link again to the right. You will be presented with the
first choice you will make. Below you will decide whether
or not you would like to include an image,
or
club
logo
with
your Ad.
If
you
choose to not include an image change the indicated item to "No" then
use the "Next" button
to continue. If you would like to learn more about uploading an image
read on otherwise you may skip ahead to the next section of this tutorial
by using the "Next" Button
above. |
|
|
|
|
|
|
|
|
|
|
 |
|
|
|
|
|
|
|
|
If
you have chosen to upload an image make sure the "Yes" option is selected,
then click the "Next" button to the left of the "Yes" selection.
Your desire to upload an image has been recorded and additional selections
will be presented to you later to facilitate the image transfer. Uploading
an image is very simple and strait forward, but you must plan ahead
for this action. Start your planning by first Locating the Image you
would like to use in your Ad, on your computer. This file must be either
a GIF file or a JPG file. It should be 400 Pixels wide by 600 Pixels
tall or smaller. Larger images will require long download times. If
you cannot locate a image file yourself for uploading, our software
cant guess where you might have left it. You may now continue to the Next step
in the Ad listing Tutorial by clicking the Next button
above.
|
|
| | | |
Transmitted: 11/21/2008 3:33:46 AM
Powered by JD Heritage

|
|
|

